Openplatform.xyz Follow @openplatformxyz
Placeholder for our stuff related to Telecom, IT, Internet of things (IOT), ESP8266, Raspberry Pi
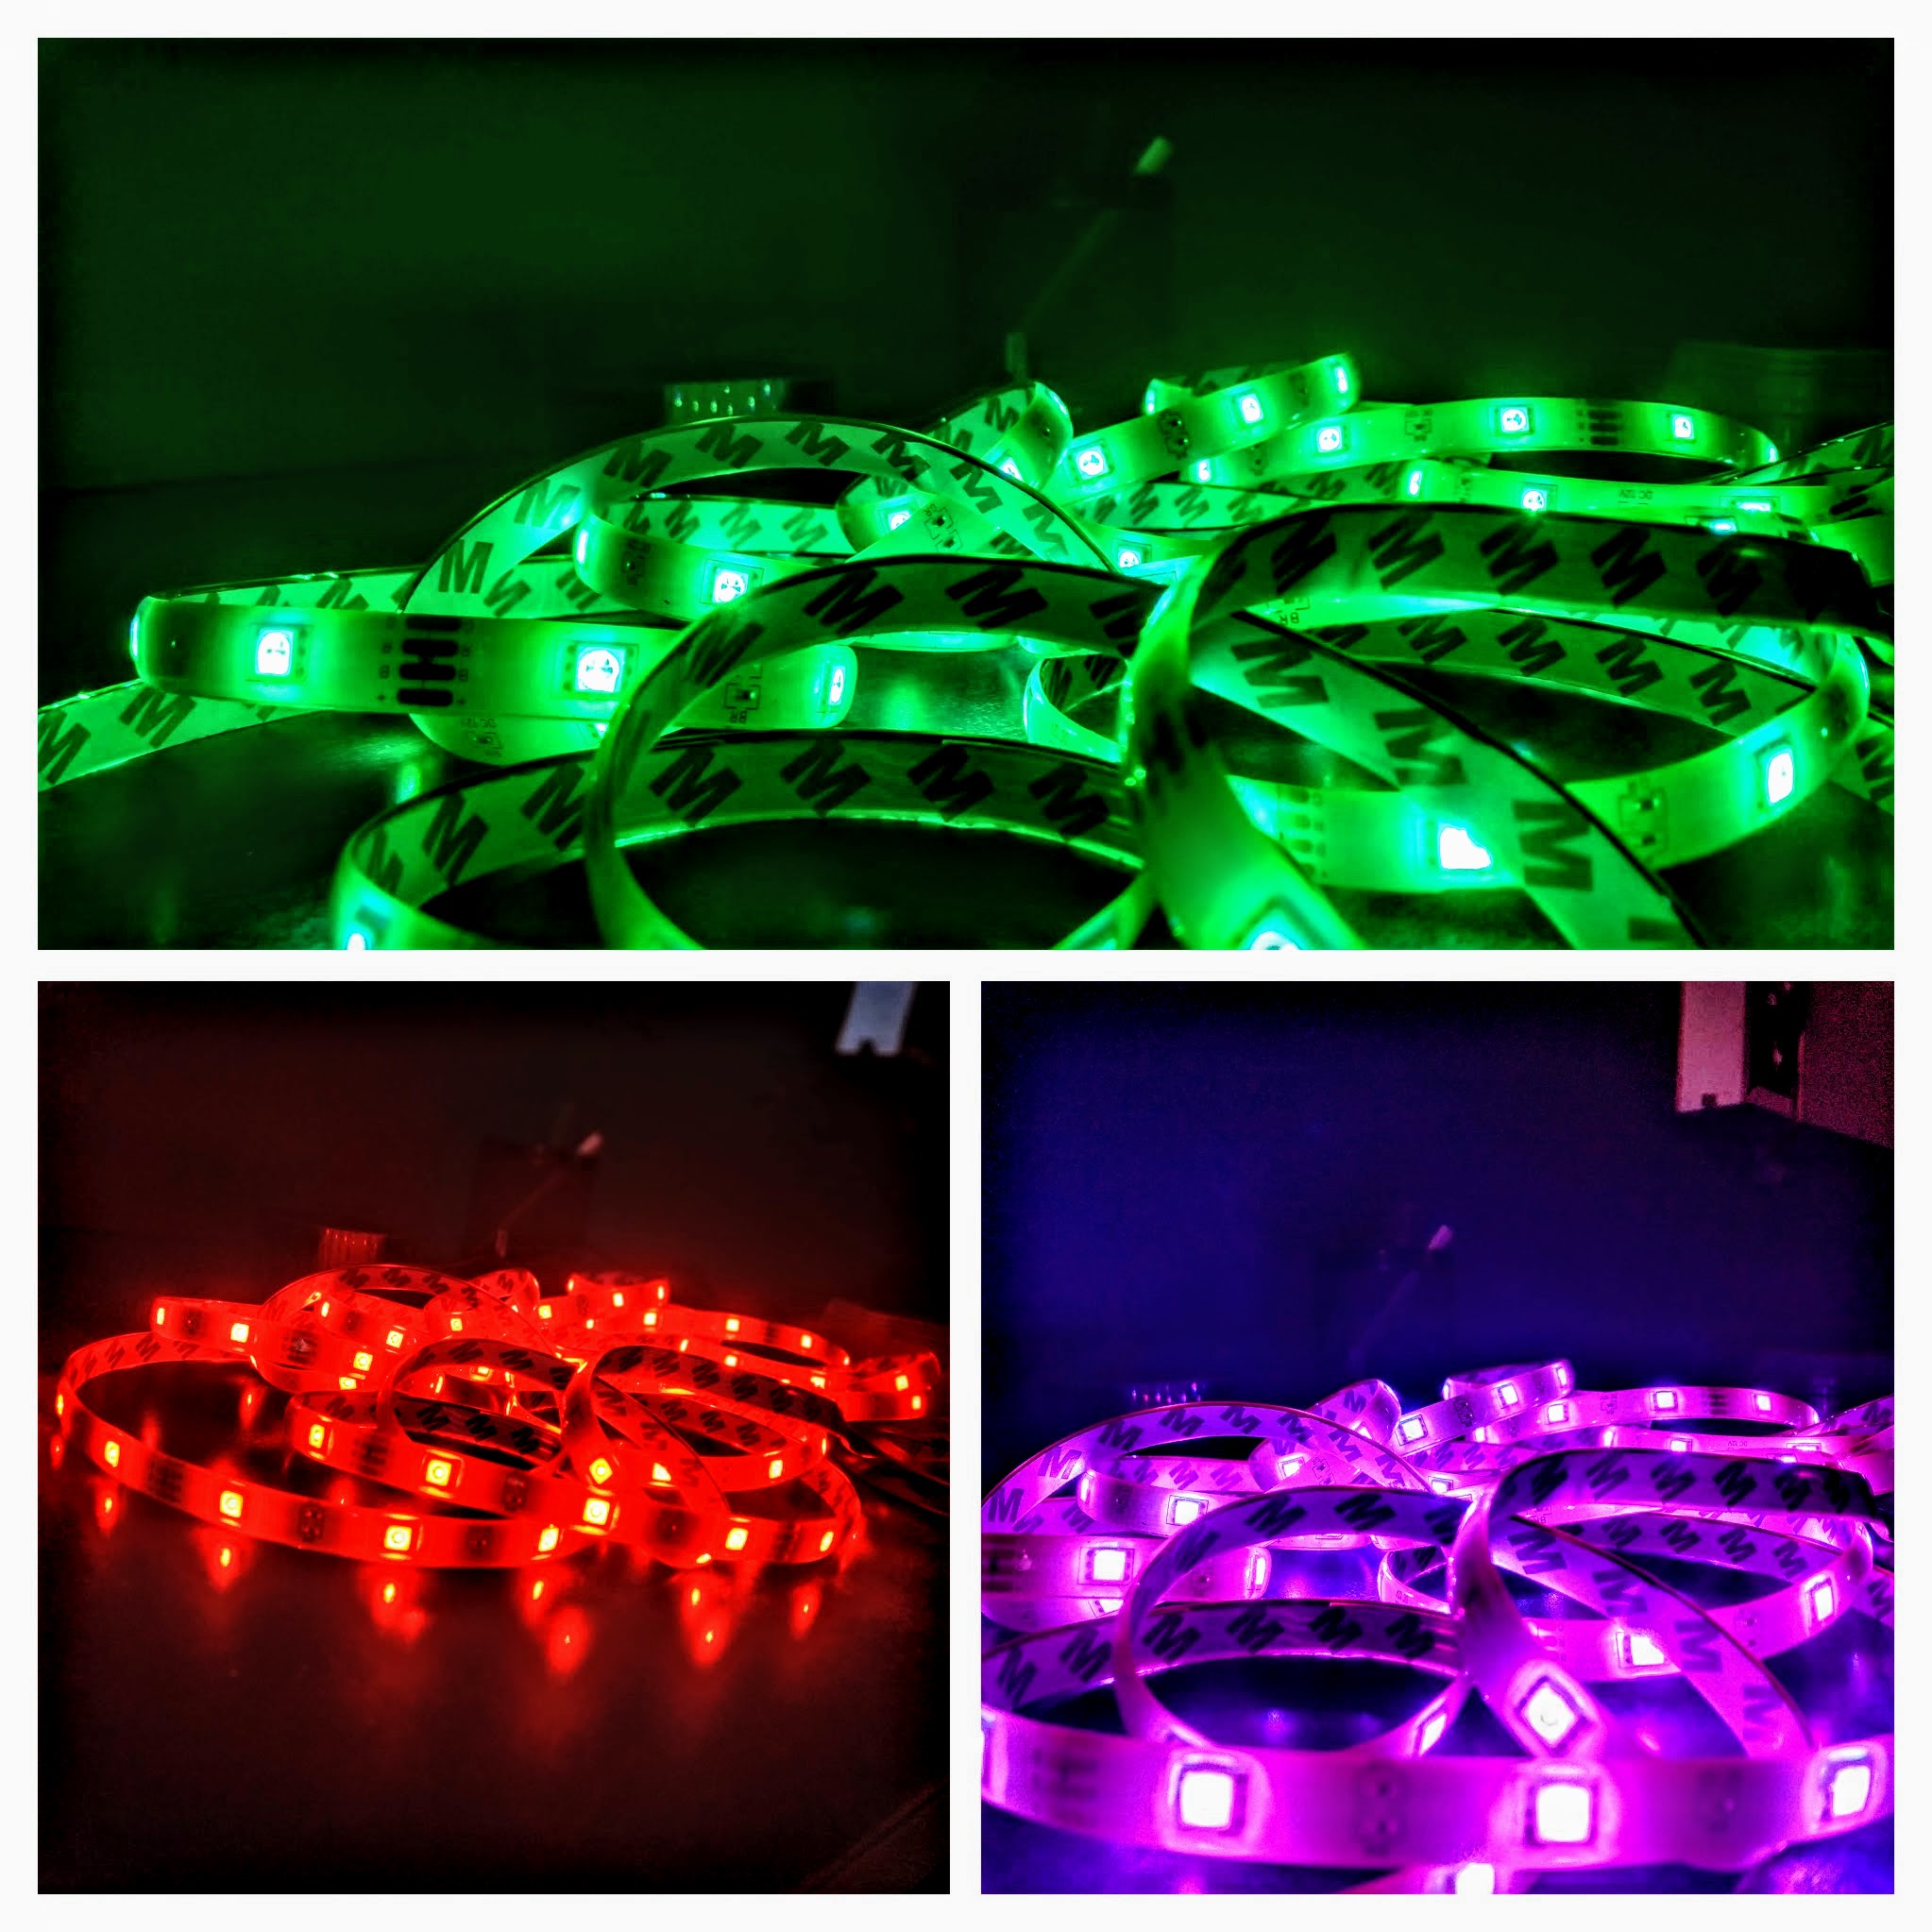
Homemade $13!! 5m LED Strip like phillips hue!
March 25, 2020
A few days back I was just surfing around the web as a usual loafer and stumbled upon some very cool PC setups with all sorts of amazing lights and everything. And the next thing I knew was that I also wanted these shiny lights. Then I headed over to Amazon and searched for it and then fainted... $75 for just 2 meters of LED!! clearly I couldn't afford that so I thought Why not make my own!!?.. I rushed towards my wardrobe and grabbed a couple of ESP8266's a $4 regular LED strip and BAANNNGGG!(mic drop) I made my very own hue lights in next 6 hours!
Just kiddoing :D but I did made it in a week.
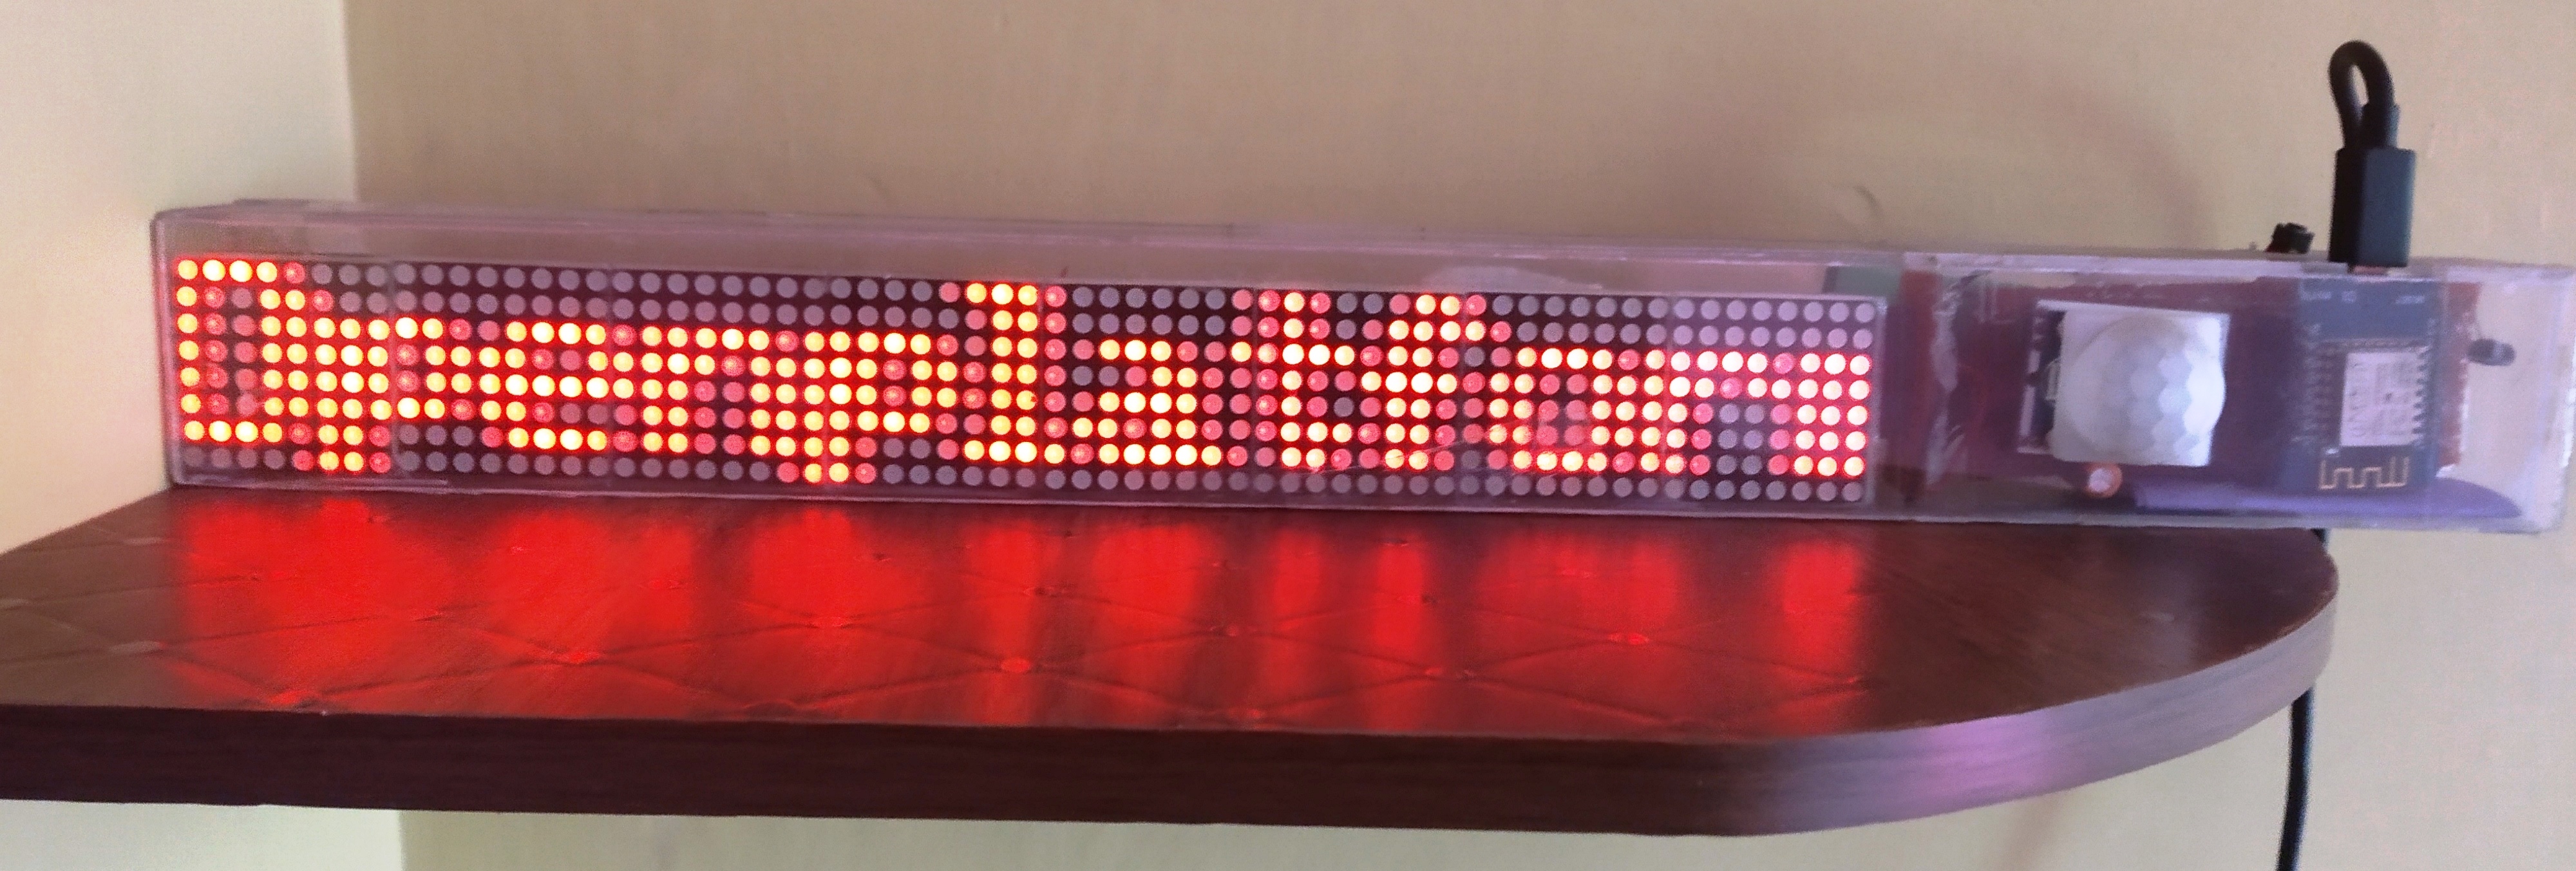
Have a look for yourself :
Cool! isn't it...?
So lets now hop right in!!
Features:
WiFi Smart LED Strip
Adjustable Colors and brightness
16 million colors (depends on quality of your LED Strip)
Animates changing colors and color wheel
WebApp to control from smartphone, PC etc. No external app required.
Inbuilt mqtt client, NTP client
Remembers last setting even after power cycle. Settings saved in EEPROM.
Alexa integrated using openhab2
Supports utterances like:
Alexa, Turn on/off
kitchenLED
Alexa set
kitchenLED to RED/GREEN/PINK/TOMATO etc.
Alexa set
kitchenLED to 30%
Control remotly from anywhere in the world using Alexa/Openhab app
Stuff Needed :
-
Wemosd1 R2 or any other esp8266 development board
-
A LED strip like this one. We need just the strip and power adopter. I used RGB5050 strip whereas phillips uses a better version RGBW.
-
IRF530N N-channel MOSFET with logic level gate like this X3
-
DC-DC Step down power module like this or you may use LM7805 Voltage Regulator IC
-
Resistances 220 ohm X3
-
General purpose PCB
Circuit :
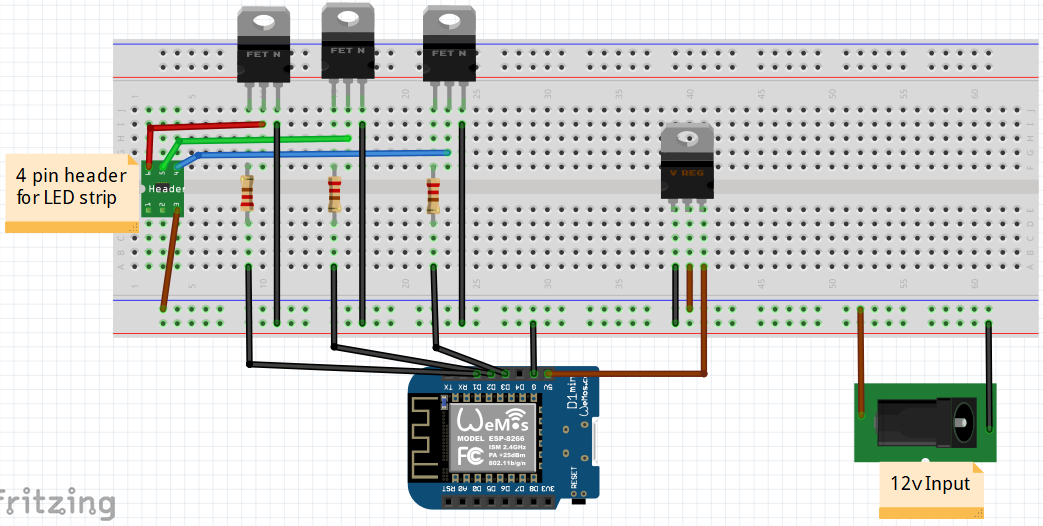
RGB5050 LED's works on 12v whereas the wemos D1 mini needs 5v input. I have used a DC-DC step down power module to step down from 12v to 5v. This module is very tiny and to select output voltage to 5v You need to solder a very tiny jumper wire . Soldering on a smallboard like this can be difficult specially if you're new to the business. Alternatively LM7805 module can also be used.
ESP8266 outputs 3.3v that's why we need logic level MOSFET. If you are looking for an alternate MOSFET make sure that it is logic level gate driven.
The esp8266 PWM signal is only 3.3v, it can not drive RGB5050 LED on it's own. I have fed 3.3v PWM signal to MOSFET Gate which inturn feeds 12v power to RGBLED as par the input gate signal.
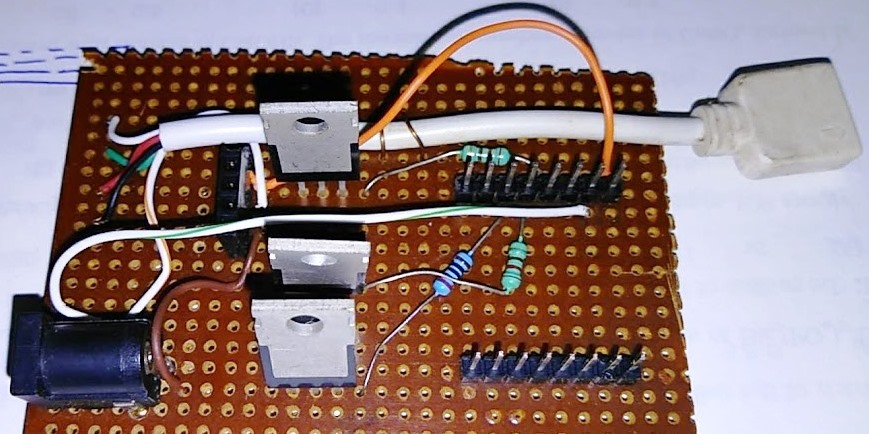
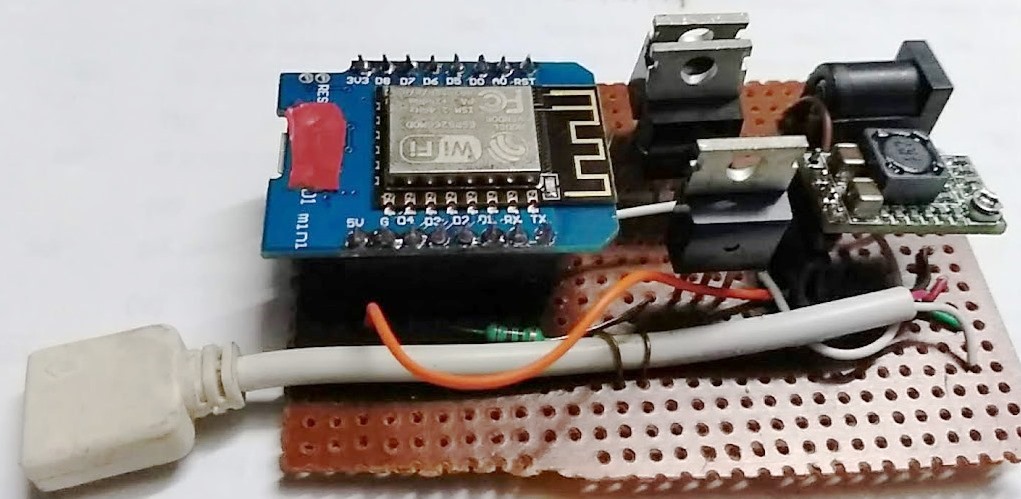
My working prototype:

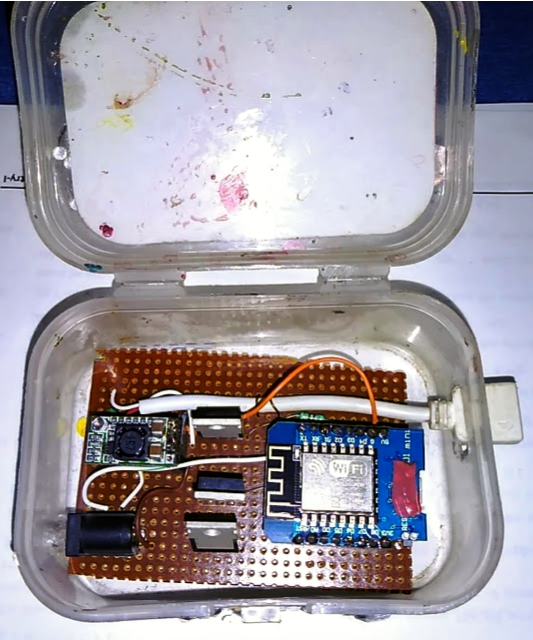
Moving Further :
- I have used RGBLED library for esp8266. This library generates appropriate PWM signals to drive RGB LED colors. Original RGBLED library is for arduino which has PWM range 0-255. ESP8266 has PWM range 0-1024 so I just replaced all 255 with 1024 in rgbled.cpp
- Install RGBLED library in arduino IDE.
- Download sketch from my github.
- Then Copy files
rgb5050-mqtt-openhab-alexa.ino and
index.h. Make appropriate changes like:
a. Change the WIFI SSID and password as per your need
b. Set the IP Address to anything you like (By default it runs on 192.168.1.158)
c. Set the MQTT Broker IP,Port, Username, Password. - Upload to wemos D1.
*Note: Code has mqtt client to connect with openhab mqtt broker. If you just want to control with web browser, remove the mqtt part from code. - Upto this point RGB LED can be controlled by the web app. Access it from: http://<Your RGB LED IP> .
- If you want to connect with openhab and alexa read further.
Integration with Openhab and Alexa :
Now before I start this make sure your openhab2 setup satisfy the
following requirements:
MQTT Binding or MQTT Broker installed and configured.
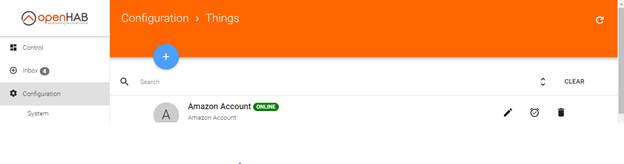
Amazon Echo Control Binding installed and configured
-
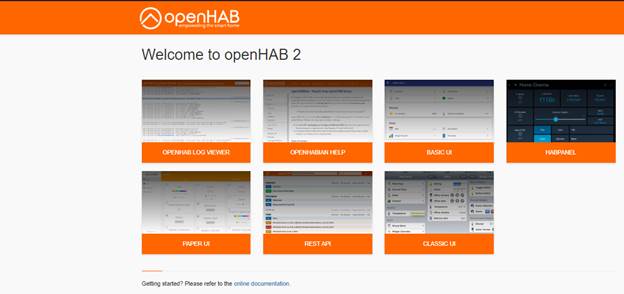
Login to Openhab http://<your openhab IP>:8080/start/index
-
open PaperUI
-
Configure a Things
-
Click on + icon to add new Thing
-
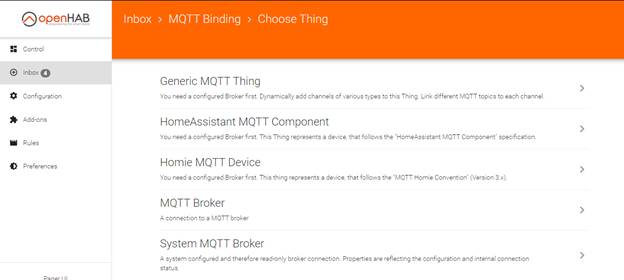
Choose MQTT Binding


-
Manually add thing
-
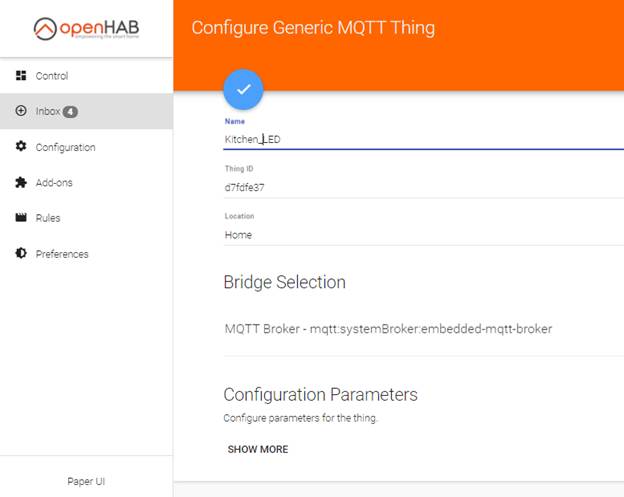
Generic MQTT Thing
-
Save by clicking on blue icon

-
Click on just created thing Kitchen_LED(Yeah I use it in my kitchen..)
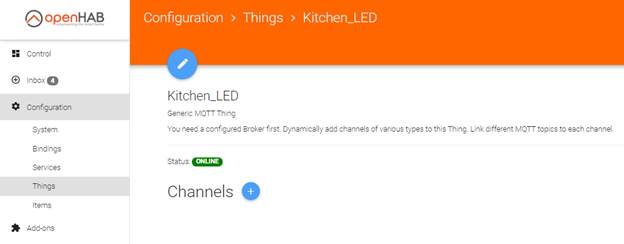
-
Click on + icon to add channels
-
Fill it and save
-
Click on Things in left pane
-
Click on just created Thing Kitchen_LED
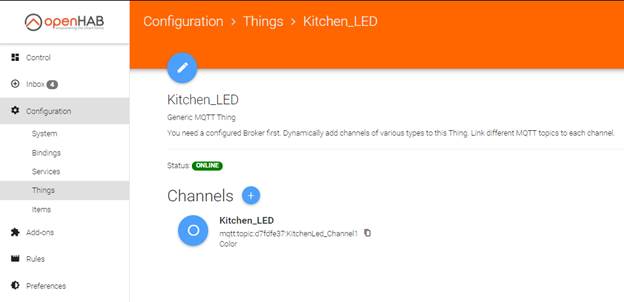
-
Click on round icon
 under
Channels.
under
Channels. -
Link Channel widow will pop up
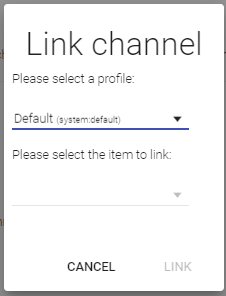
-
Please select a profile: Default (system default)
-
Please select the item to link: + Create new Item
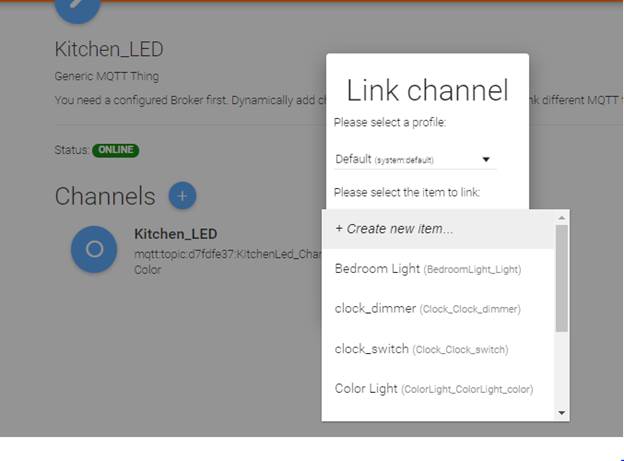
-
In the category write “Light”, other fields will be already populated as given below
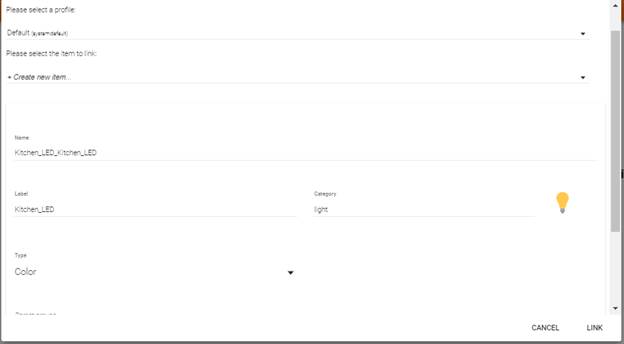
-
Click on LINK
-
Verify that a new Item Kitchen_LED is now available

-
Click on copy icon next to Kitchen_LED_Kitchen_LED
-
Edit the tags so that Alexa can discover it
-
http://<Your LED IP>:8080/ (192.168.1.158 by default)
-
Select REST APP
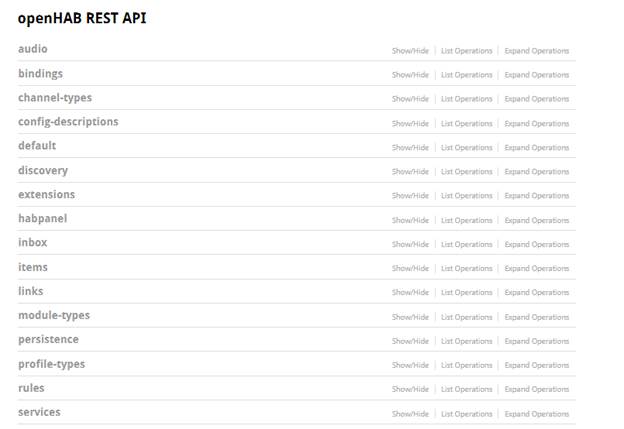
-
Click on items to extend
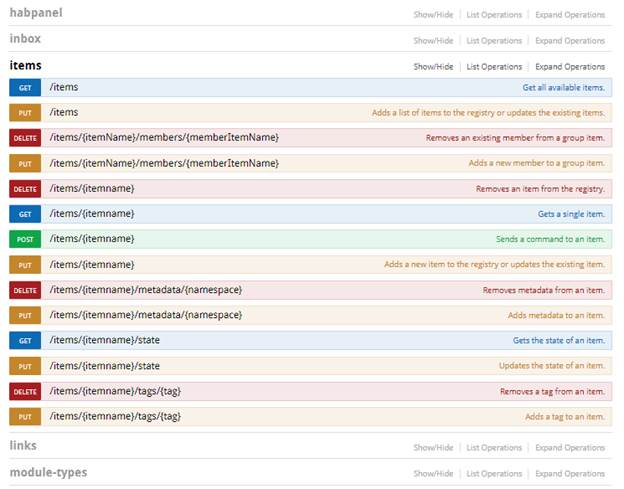
-
Click on “PUT /items/{itemname}/tags/{tag}” to Add tags to Kitchen_LED item so that Alexa can discover this new Device.

-
Click on “Try it out” to save

-
Now It’s all set. Ask Alexa to Discover Devices.
-
Rename the newly discovered Devices as you like in Alexa App.
Going Further :
Add IR remote support by adding IR Reciver and IRremote LibraryAdd some more animations.
Niiceeee! that's what people say when they find this thing in my kitchen. SERIOUSLY !! is what they say after I tell them the money I saved building it :D.
So, yeah I hope you liked the blog probably the first comprehensive blog in a while. Openplatform.xyz is new but don't let it's novelty make you underestimate us!! Cause we've got pretty good stuff up our sleves! So yeah stay tuned for more.
**If you encounter any problem while following the tutorial make sure you start a issue on my github repo also feel free to contact me on [email protected].
 Home
Home Internet Of Things
 Telecom
 IT stuff
 About Us
 Contact Us
 Site Map
Suresh Hariramani
I am an IOT enthusiast with more than 20 years of experience in the IT sector. Specializing in telecom service's; follow me for some very innovative and best in class IOT products as I unfold my knowledge and passion for the subject.

Vatsal Hariramani
Just me, myself and I, exploring the universe of uknownment. I have a heart of love and interests in technology, IOT and travel . And I want to share my world with you .